


2179€
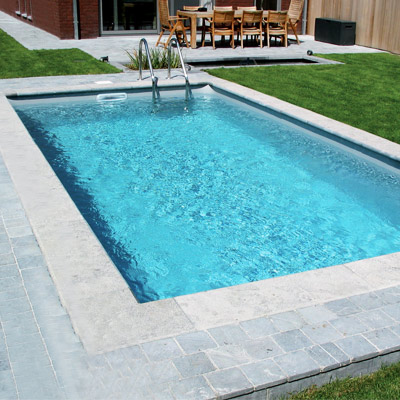
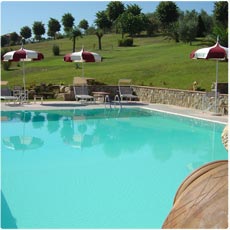
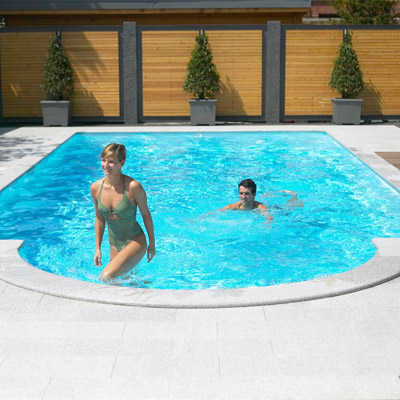
Inground pool kits
Discover our pool kit solutions allowing you to create your own in-ground pool :
- Galvanised steel panel kits
- Kits for concrete shuttering
- Equipment kits (plumbing, filtering, sealing parts)
- Galvanised steel panel kits
- Kits for concrete shuttering
- Equipment kits (plumbing, filtering, sealing parts)
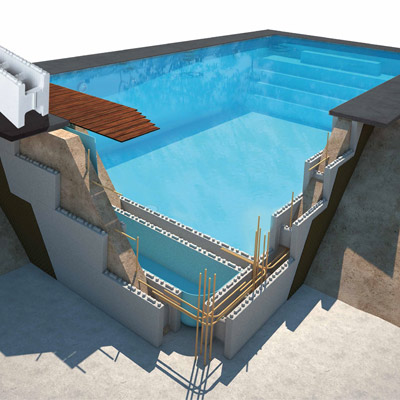


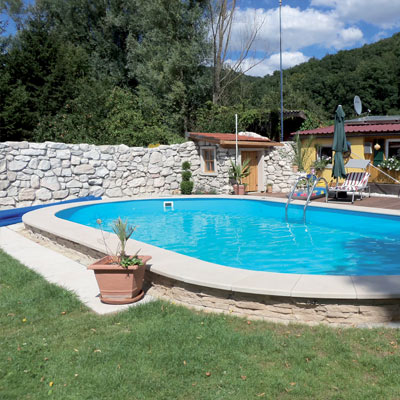
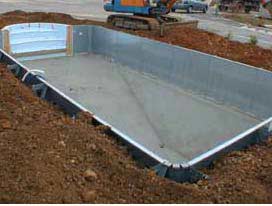
Example of a galvanised steel panel pool kit construction
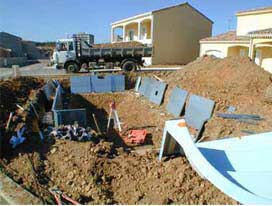
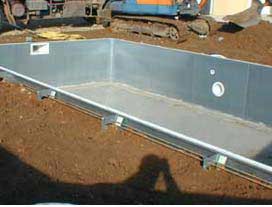
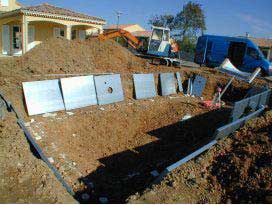
Day 1 - after landscaping, position each of the steel
panels into place
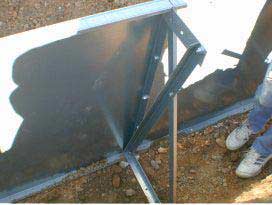
Day 1 - Bolt the structure together, fit supporting struts
and position definitively

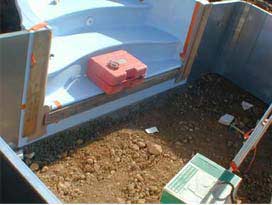
Day 1 - fit and position the pool steps
Day 1 - Levelling of structure
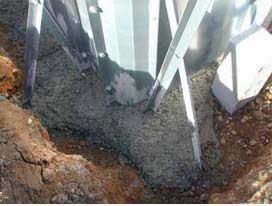
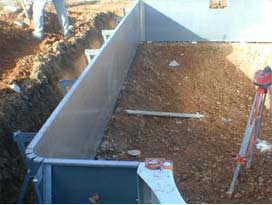
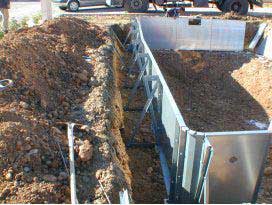
Day 2 - Set base of supporting struts in concrete once pool
structure is perfectly levelled
Day 2 - Reinforce the base of pool step structure with
concrete blocks and concrete
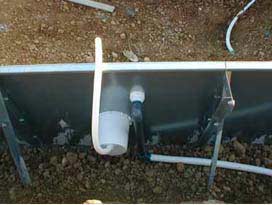
Day 2 -Prepare the installation of the pool projector
and brush adaptor
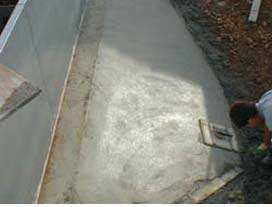
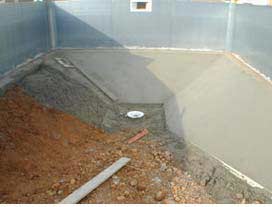
Put the concrete screed and main drain into place
on the pool floor
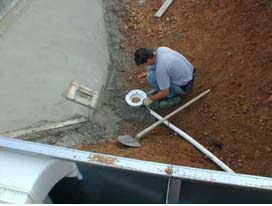
Day 3 - Put the concrete screed and main drain into
place on the pool floor
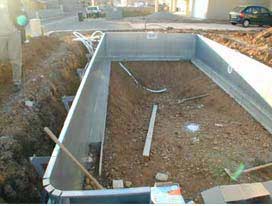
Day 3 - finish the concrete screed on pool floor before
backfilling the pool walls
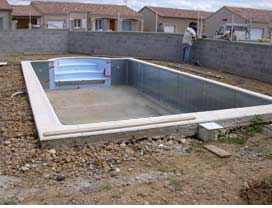
Day 4 - Reinforce the upper section of supporting struts and
peripheral reinforcement with building rods and concrete before
positioning the pool border
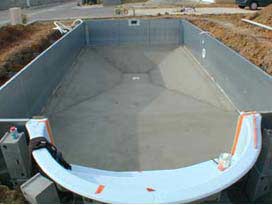
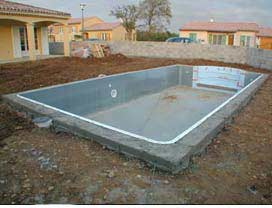
Day 5 - Installation of the pool border
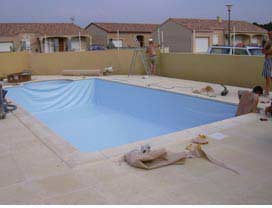
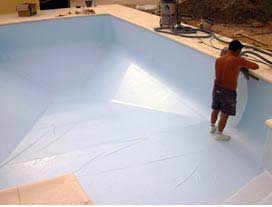
Day 5 - Pool liner finitions
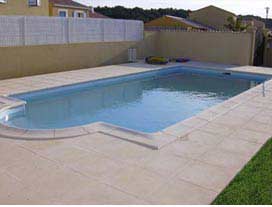
Day 6 - Your pool is ready - Enjoy!
Day 1 - after landscaping, position each of the steel
panels into place
Day 1 - Bolt the structure together, fit supporting struts
and position correctly

Day 1 - Anchoring of supporting struts with metallic structure
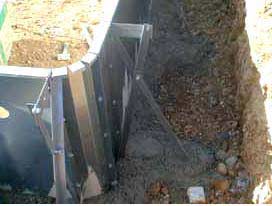
Day 2 - Set base of supporting struts in concrete once
the structure is perfectly levelled
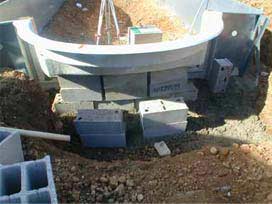
Day 2 - Reinforce the base of the pool steps structure
with concrete blocks and concrete
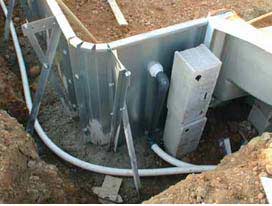
Day2 - Install the flexible PCV piping and discharge nozzles
Day 3 - Put the concrete screed and main drain into place
on the pool floor
Day 3 - Put the concrete screed and main drain into place
on the pool floor
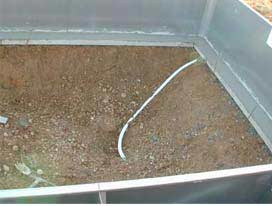
Day 3 - finish the pool floor concrete screed before
backfilling the pool walls
Day 4 - Backfill pool walls
Day 4 - Reinforce the upper section of supporting struts
and peripheral reinforcement with building rods and concrete before
positioning the pool border
Day 5 - Install of pool liner and vacuum by suction
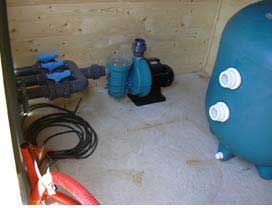
Day 6 - Installation of technical shelter and plumbing network
Please consult
Installation guide for pool kit
Photos non-contractual
Ask for a free quote inground pool kits
Other product : Inground pool kits
Starting from 2265 eur Including VAT.
Please fill in this form carefully. Our commercial service will handle your request promptly.
UK freephone hotline
Monday Friday 9.00 18.00

Spare parts order
You are looking for a spare part for «Inground pool kits» ?
Please click the button below. Our commercial service will handle your request promptly.


