 FAQ - Swimming Pool Online advice and recommendations
 Installation guide for pool kit
  Fitting the panels of your pool kit - FAQ
 Fitting the panels of your pool kit - FAQ
Step by step advice on how to fit your pool kit panels in detail with Swimming Pool Online
Installation guide for pool kit
The composition of a pool kit
Tracing and excavation of your pool
Fitting the panels of your pool kit
Applying concrete and bottom screed
Installation of plumbing and technical shelter
Installation and fitting of sealed liner and filling your pool
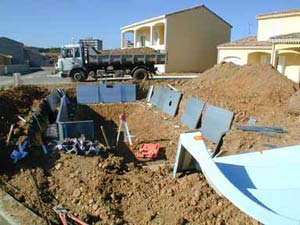
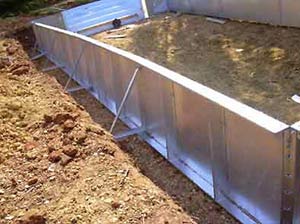
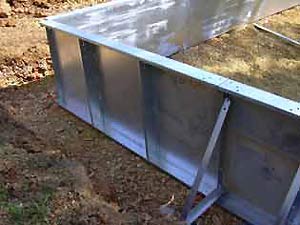
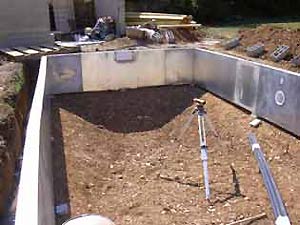
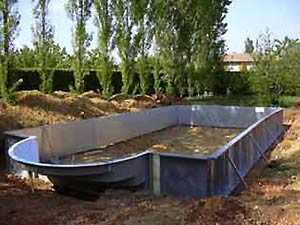
Using a marking line, metal stakes and a builders level: For a pool with a gentle slope, define two distinct points at the extremities of the beginning of the slope.
Insert an iron rod at each point and tighten the line which will represent the shallow side of the concrete screed.
To visualise the deep end, follow the same procedure: The marking line will represent the deepest part of the pool.
For slopes from lateral walls, measure a height of 1,20 m from the bottom of the steel wall. Using a plumb line, transfer this height to the bottom of the deepest part of the pool. Insert a metallic stake in the ground measuring the height of the future concrete screed. Repeat the operation till the bottom surface of this sector is completely traced.
For a varied levelled pool, pull a marking line between the most shallow side and the deep end.
This line will mark the concave aspect of the bottom surface and the sides of the pool.
In the case of free-form or circular pools, the same objective is reached with a series of stakes. The line is used only in the case of rectangular pools.
The pickets or stakes are used as guides when the concrete is put into place. They are driven into the concrete by a hammer. Marking tape can be used to indicate the height of concrete at the base of the panels. This ensures a uniform concavity around the total parameter of the pool.
For the liner to fit correctly it is imperative to follow implicity all the indicated dimensions.
Next step : Applying concrete and bottom screed
The composition of a pool kit
Tracing and excavation of your pool
Fitting the panels of your pool kit
Applying concrete and bottom screed
Installation of plumbing and technical shelter
Installation and fitting of sealed liner and filling your pool
Installation of pool panels
Before commencing, check the list of material you need to ensure all you require is on site.
Using you implantation schema, mark the shape and exact position of your panels (the schema is generally included with your kit).
Use steel stakes to guide to the position of each steel panel.
Use marker spray to trace the guideline to follow during the panels installation.
Place the panels around the excavation cavity ensuring that the panels which include the reservation for the skimmer and discharge nozzles are correctly positioned.
Place the panel braces around the pool cavity so they will be at hand when assembling the panels.
Put the nuts and bolts in a bucket.

Begin assembly by a corner panel.
Add straight panels and continue till the contour of the pool has been positioned.
The panels are straight and self-supporting unless there is a very long wall length. In this case, link the panels as to avoid them leaning towards the inside of the pool cavity.
The curved panels stay upright with a minimum of support.
Link each panel edge to edge. Using a doweling rod, line up the holes in the panel's joining clamp. Use a trigger clamp to maintain the panels in place allowing you to fix the nuts and bolts independently. Check positioning and screw the nuts and bolts into place.
Ensure each panel is correctly placed and levelled, using the stakes as guides.
Insert an iron rod in the designated hole at the base of each panel. Repeat the operation till the entire parameter of the pool has been bolted. You can install only 3 bolts to panel extremities of the at this stage. The remainder of bolts are used when positioning braces and terrace supports.
Once the panels are joined, check all dimensions.
Continue with braces and terrace supports.
Fix the panels and A-frames using a stake.
At this stage, check all nuts and bolts are correctly tightened.
Note: If the pool features steps, fix the panel to the edges using a hand press, taking into account the height of pool coping.
Drill the holes through the stair flange. Insert and tighten bolts.
Install the step supporting frame.
Use a builder's level. When you line up using the reference mark, establish the elevation of the upper section of the panel and visually mark it using marking spray.
Check the whole parameter of the pool, measuring the height of each panel. The difference between the highest and the lowest will help you to select the spacers you may need to regulate levelling.
Always begin the process of levelling at the highest point.
Using a pry-bar, shims and spacers, lift and level each panel. Gently tap each panel, to ensure stability and minimising soil compaction.
Check again the level of each panel.
In sand-textured or unstable ground, place a concrete block under each panel junction and place spacers.
This reduces compaction and ground movement.
Spacers must be placed under each panel. In the case of a rectangular pool, firstly, level the corners and after the sides.
These panels, once bolted, are rigid enough to support a length without the earth caving in. Level all panels on the totality of the contour and check height once again.
Using a spirit level, ensure the front-facing section of the panel is vertical. You can put a block behind each A-frame. Lift the behind of the A-frame and incline towards the pool. If you lift the frame you incline it towards the pool. If you lower it you incline towards the outer side of the pool.
When the panels are straight and levelled, insert the struts in the rear section of the A-frame. These struts help to maintain panel support when you put your concrete into place. The number of struts needed depends on the type of earth texture. If for example, your earth is very heavy, you will need fewer struts than if your earth has a light and sandy texture.
Add straight panels and continue till the contour of the pool has been positioned.
The panels are straight and self-supporting unless there is a very long wall length. In this case, link the panels as to avoid them leaning towards the inside of the pool cavity.
The curved panels stay upright with a minimum of support.
Link each panel edge to edge. Using a doweling rod, line up the holes in the panel's joining clamp. Use a trigger clamp to maintain the panels in place allowing you to fix the nuts and bolts independently. Check positioning and screw the nuts and bolts into place.
Ensure each panel is correctly placed and levelled, using the stakes as guides.
Insert an iron rod in the designated hole at the base of each panel. Repeat the operation till the entire parameter of the pool has been bolted. You can install only 3 bolts to panel extremities of the at this stage. The remainder of bolts are used when positioning braces and terrace supports.
Once the panels are joined, check all dimensions.
Continue with braces and terrace supports.
Fix the panels and A-frames using a stake.
At this stage, check all nuts and bolts are correctly tightened.
Note: If the pool features steps, fix the panel to the edges using a hand press, taking into account the height of pool coping.
Drill the holes through the stair flange. Insert and tighten bolts.
Install the step supporting frame.
Levelling the panels
Use a builder's level. When you line up using the reference mark, establish the elevation of the upper section of the panel and visually mark it using marking spray.
Check the whole parameter of the pool, measuring the height of each panel. The difference between the highest and the lowest will help you to select the spacers you may need to regulate levelling.
Always begin the process of levelling at the highest point.
Using a pry-bar, shims and spacers, lift and level each panel. Gently tap each panel, to ensure stability and minimising soil compaction.
Check again the level of each panel.
In sand-textured or unstable ground, place a concrete block under each panel junction and place spacers.
This reduces compaction and ground movement.
Spacers must be placed under each panel. In the case of a rectangular pool, firstly, level the corners and after the sides.
These panels, once bolted, are rigid enough to support a length without the earth caving in. Level all panels on the totality of the contour and check height once again.
Vertical aligning
Using a spirit level, ensure the front-facing section of the panel is vertical. You can put a block behind each A-frame. Lift the behind of the A-frame and incline towards the pool. If you lift the frame you incline it towards the pool. If you lower it you incline towards the outer side of the pool.
When the panels are straight and levelled, insert the struts in the rear section of the A-frame. These struts help to maintain panel support when you put your concrete into place. The number of struts needed depends on the type of earth texture. If for example, your earth is very heavy, you will need fewer struts than if your earth has a light and sandy texture.


Checking gradients
Using a marking line, metal stakes and a builders level: For a pool with a gentle slope, define two distinct points at the extremities of the beginning of the slope.
Insert an iron rod at each point and tighten the line which will represent the shallow side of the concrete screed.
To visualise the deep end, follow the same procedure: The marking line will represent the deepest part of the pool.
For slopes from lateral walls, measure a height of 1,20 m from the bottom of the steel wall. Using a plumb line, transfer this height to the bottom of the deepest part of the pool. Insert a metallic stake in the ground measuring the height of the future concrete screed. Repeat the operation till the bottom surface of this sector is completely traced.
For a varied levelled pool, pull a marking line between the most shallow side and the deep end.
This line will mark the concave aspect of the bottom surface and the sides of the pool.
In the case of free-form or circular pools, the same objective is reached with a series of stakes. The line is used only in the case of rectangular pools.
The pickets or stakes are used as guides when the concrete is put into place. They are driven into the concrete by a hammer. Marking tape can be used to indicate the height of concrete at the base of the panels. This ensures a uniform concavity around the total parameter of the pool.
For the liner to fit correctly it is imperative to follow implicity all the indicated dimensions.
Next step : Applying concrete and bottom screed
Photos non-contractual


